Support | Ochatbot
Ochatbot – Live Chat
Live Chat enables you to directly chat with your users when logged into your Ometrics account. You have the option to passively wait until the user initiates the chat via your Ochatbot or actively initiate the chat by sending individual users a message of your choice. Check out our blog post if you want to know more about incorporating live chat into your business.
Logging In
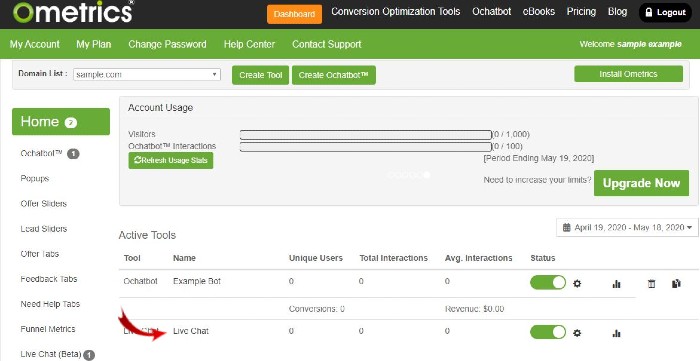
On your Ometrics Dashboard, click the Live Chat link to open the Live Chat dashboard.
Getting Started
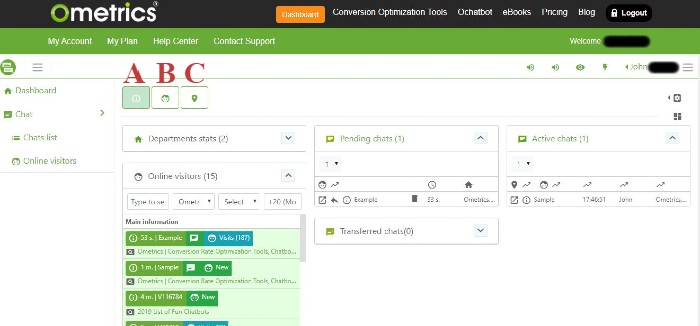
When you first arrive on the Live Chat dashboard you will see the default dashboard view (A.) but have your choice of two other views: Online visitors list (B.) or Online visitors on map (C.) Let’s explain them each below:
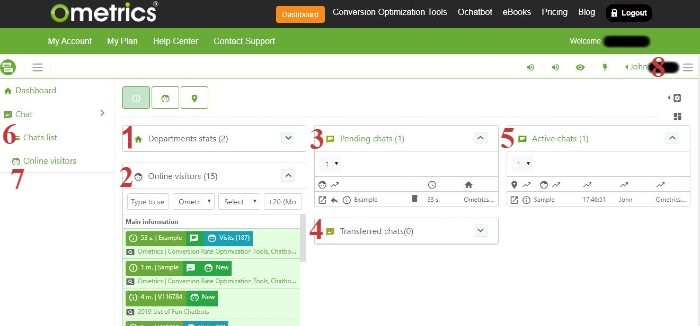
A. Live Chat Dashboard
1. Department Stats: Here you can view how many Active and Pending chats for each domain on your account.
2. Online Visitors: Here you see individual users and their relevant information such as how long they have been on the site, what page they are on, and more. (More information about the Online Visitor details is below)
3. Pending Chats: Once a chat is initiated or accepted by the user they will appear here. They will stay here in pending until the operator either: A.) accepts the chat by clicking on the user’s name or clicking the “Open in a new window” icon or B.) redirects the user to the contact form by clicking the redirect icon.
4. Transferred Chats: Here you can see any transferred chats.
5. Active Chats: Here you can view all of the active chats still ongoing.
6. Chats List: The list here includes ALL of your chats; current chats and old chats.
7. Online Visitors: You can access the Online Visitors List view from here as well.
8. Account Settings: Here you can access your account to edit your account information, select which lists you would like visible, create and manage your personal canned messages, manage your personal auto responder message, and select how you would like to receive notifications.
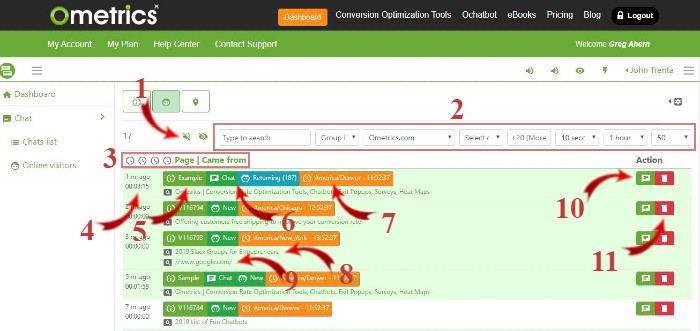
B. Online Visitors List
1. Notifications: Manage your notifications here.
2. Custom Filters: Search for a user in the type box or select the filters you would like to apply to the list.
3. Default Filters: Select from the default filters to easily sort users by last activity, time on site, visitor local time, by user status on site, which page they are on, or which page they came from.
4. Time on Site: How long the user has been on your site.
5. User ID: Default ID given by Ometrics system.
6. Status: View if the user is New, has started a chat (name user gives will be displayed along with the chat icon), or if they are a returning user that displays how many times they have been to your site.
7. User Time Zone: Tells you the user’s time zone and local time.
8. Current Page: What page the user is currently on.
9. Page Came From: What page the user came from.
10. Send a Message: Option to send the user a message (Actively initiating a chat is explained below).
11. Delete User: Delete the user from this list.
C. Online Visitors On Map: Coming soon!
How To Initiate a Live Chat
There are two ways to initiate a Live Chat with a user either Passively or Proactively. Let’s break down each:
Passive Initiation
You can choose to sit and wait for a user to take the lead on initiating a chat by giving them the option within your Ochatbot. You can choose to place a Live Chat button in highly trafficked areas of your Ochatbot to promote your live chat for more active sales cycles/agents. The other passive option is to place the Live Chat button in just your fallback reply to limit the live chatting to users not satisfied by the AI chatbot responses. Let’s go through step-by-step how a user would initiate a chat:
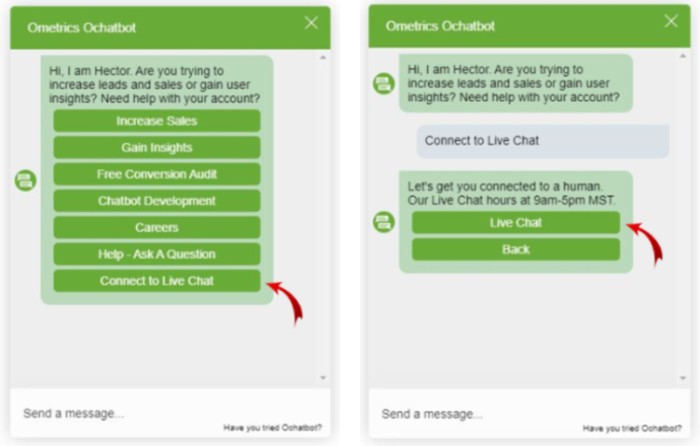
Ochatbot Button
Clicking the Live Chat button brings the user to the Live Chat intent that displays the Live Chat hours. From there they can select to connect to Live Chat.
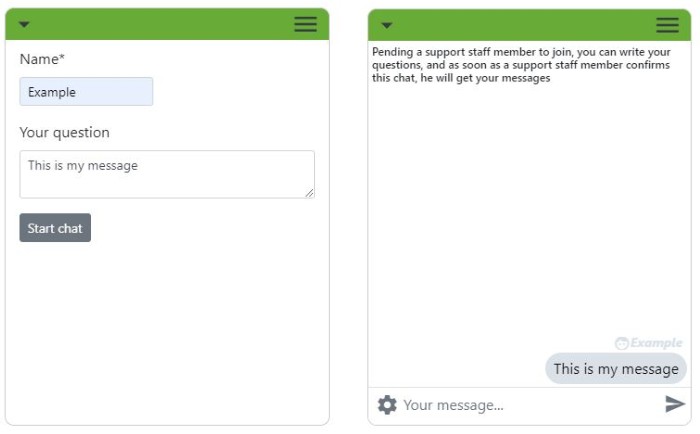
Fill Out Form & Wait For Operator
This step involves the user inputting their name and the first message they would like to send to the operator.
Then the user must wait for the operator to accept the chat. If there is no operator online, the user will be sent to a contact form where they can send in their message or inquiry (this contact form will automatically be sent to the email address entered in your Alerts tab).
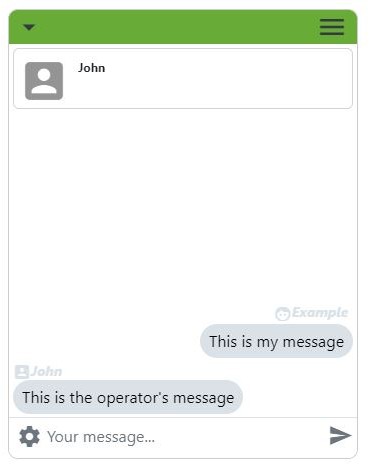
Start Chatting
Once the operator accepts the chat, the user and the operator are now connected and are able to start chatting away!
Proactive Invitation
You can also choose to proactively invite a user to chat by messaging individual users to prompt them to initiate the chat. When you send the user a message, the AI chatbot widget will disappear and be replaced by a small window displaying your message to them. As always, try testing different invitation messages to see which message captures more users. Let’s go through step-by-step how you actively initiate a chat:
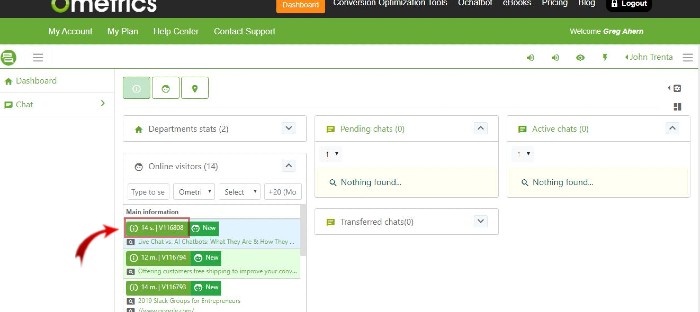
Click on User Information
Click on the User ID to open a popup window that displays more detailed information.
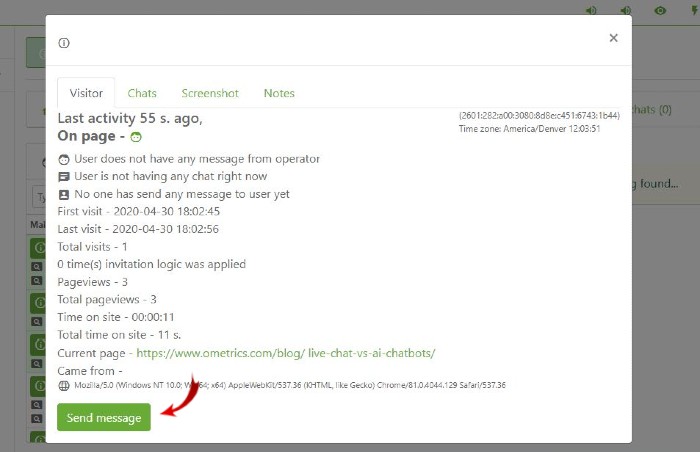
Click Send a Message
Here you can view many details about the user. Click the Send a Message button to open the next popup.
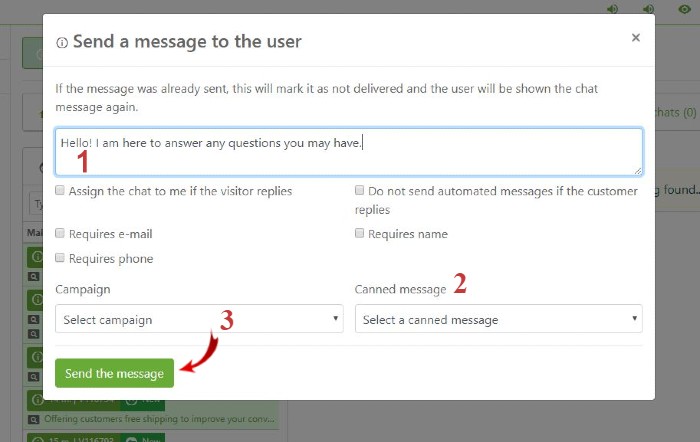
Enter Your Message and Send
1. Type your message here. Pay attention to which page they are on to customize the message to help increase conversions. For example, if they are on a warranty page try asking if they have questions about your warranty or if they are on a specific product page try tailoring the message towards that product (i.e. “Those new Nikes are great and are our most popular shoe recently! I can help you with questions about sizing, colors, etc.”).
2. Select from your canned messages with this dropdown menu. You can create and edit your canned messages under the Accounts section (your name at the top right corner of the dashboard).
3. Click Send the message to send your message to the user.

User View
The user’s AI chatbot will now disappear and be replaced with your custom message (pictured left). They can then click on the window and input their name and message (pictured right).
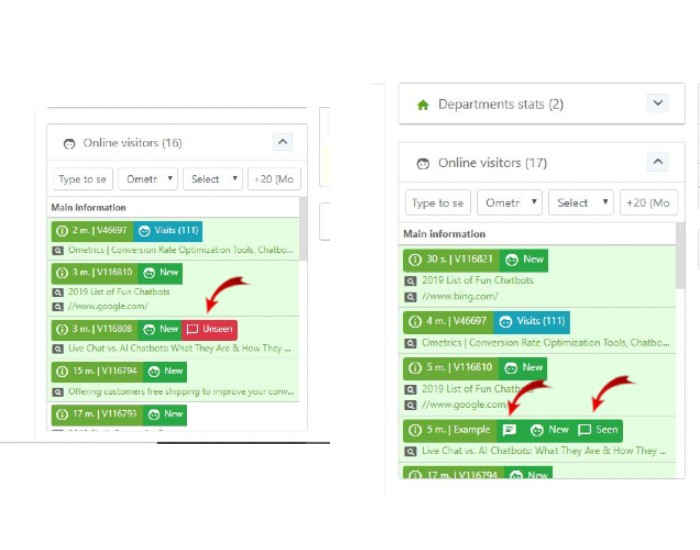
Operator View
The operator can then see if the user has either not seen the message (pictured left with the red “Unseen” box) or seen the message and/or started chatting (pictured right with the green “Seen” box and/or the green “chat” icon).
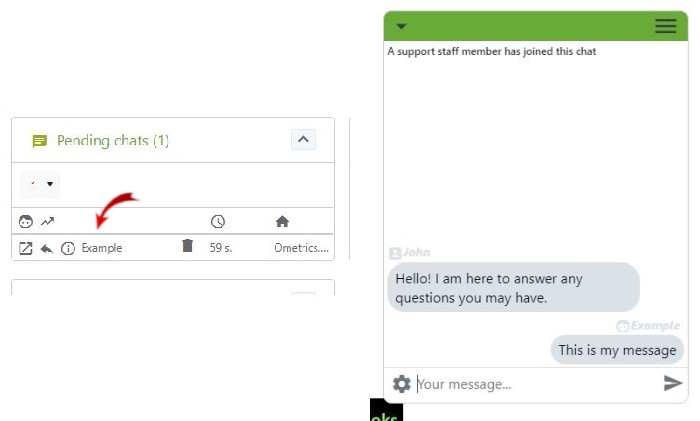
Chat Accepted
Once the user accepts the chat, they will now appear in the Pending Chats list (pictured left) until the operator either accepts the chat or redirects the user to the contact form. If the operator accepts the chat they will be connected and can start chatting (pictured right is the user’s final view of the chat window).
We Are Here to Help
Here are the different ways you can contact support:
- When logged in, click the "Contact Support" button. Your information will be autopopulated so just type in your question or comment.
- To create a ticket when not logged in email: [email protected]
- Call us during business hours: 8 a.m.-5 p.m. MST 800-700-8077.
- If outside the US: send an email to [email protected] and we will set up a meeting over Zoom.