Support | Lead Sliders
Lead Sliders – Get Started
Capture leads on your site without frustrating your visitors with annoying popups. Lead Sliders slide from the bottom or side of your page but still allows visitors to continue reading the content on your page. Unlike full screen exit popups Lead Sliders stay on the site when minimized so visitors can fill them out later. Lead Sliders often increase conversions on your site from 10% to over 100%. Lead Sliders have three preset forms; if you are looking to create your own slider with text and images then try Offer Sliders.
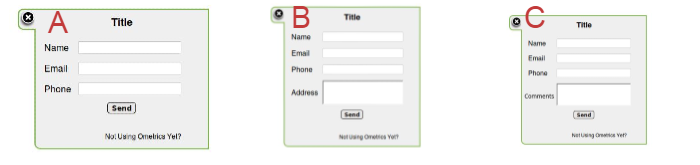
The three preset forms include:
A. Lead Slider – Name, eMail, Phone
- Used best for gathering contact information for leads to call or email nurturing campaigns. Try “Get a Quote” or “Register Today”
B. Lead Comments Slider – Name, eMail, Phone, Comment
- Allows the user to ask a question or add additional information to their request. Try “What Application Do You Need Help With?” or “Let Us Know What You Think and Win an iPad!”
C. Lead Address Slider – Name, eMail, Phone, Address
- Best used for real estate leads or home services because it includes an address field to help categorize your incoming leads by location or region.
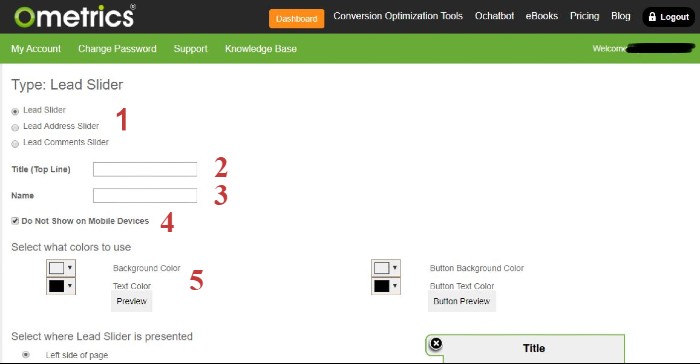
- Type: Choose the type of lead slider you want to start building
- Title: What you input here will appear at the top of the lead slider window. Be sure to use action words to create interest in your visitor.
- Name: Use this field to name your lead slider. This helps you keep organized when creating multiple lead sliders for different campaigns or initiatives.
- Do Not Show on Mobile: Check this box if you would like the lead slider to NOT show on mobile. This helps keep your mobile site uncluttered and makes sure to not overly annoy or bombard your mobile visitor.
- Select Colors: Here you can match your branding and color scheme to fit the offer slider. You can change the background color and text color to your liking. Remember to use contrasting colors to make it pop and readable.
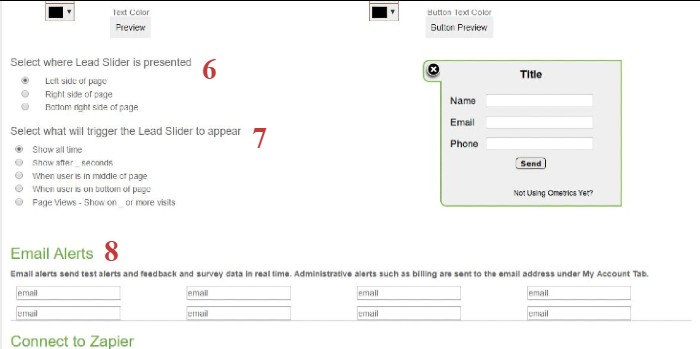
6. Select Where Tab is Presented: Here you choose what side of the page you would like the tab to appear: left, right, or bottom right of your page. This allows you to choose your configuration when running multiple campaigns at the same time on the same page.
7. Select When Slider Appears: This is the most important configuration to engage with your visitor to help increase your conversions the most. You can select from a number of different triggers such as showing after a certain number of seconds or when your visitor is about to leave the site (Exit Trigger).
8. Email Alerts: Input the email address you would like to send the Ometric alerts when a visitor interacts with your lead slider.
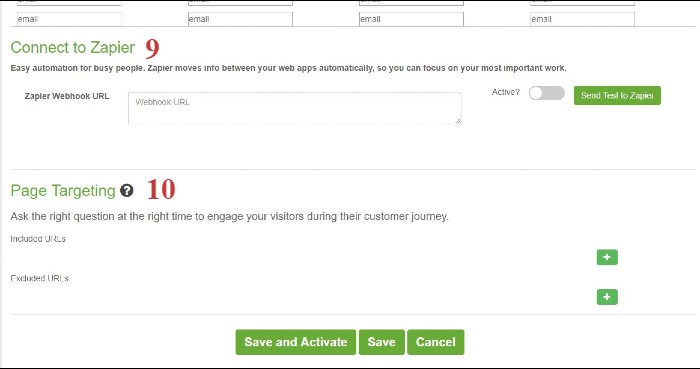
9. Connect to Zapier: Zapier creates a connection that sends data directly from Ometrics straight to your CRM. Enter your Zapier Webhook URL (which you get from your Zapier account) here then make sure it is Active to send a test to Zapier. Learn more about Zapier here.
10. Page Targeting: Include or exclude the lead slider from certain pages or sections of your website here. Click the “+” button to start a new inclusion or exclusion then input the URL using RegEx.
Frequently Asked Questions
My lead slider isn't converting as high as I would like, what should I do?
It’s hard to pinpoint exactly the issue but we always recommend testing, testing, and more testing. Try more action words or something more exciting than “sign up for our newsletter” such as highlighting that subscribers get a discount code or coupon.
We Are Here to Help
Here are the different ways you can contact support:
- When logged in, click the "Contact Support" button. Your information will be autopopulated so just type in your question or comment.
- To create a ticket when not logged in email: [email protected]
- Call us during business hours: 8 a.m.-5 p.m. MST 800-700-8077.
- If outside the US: send an email to [email protected] and we will set up a meeting over Zoom.