Support | LeadBot
LeadBot Setup
Here we will describe step by step how to setup your own LeadBot. LeadBots are pre-built lead generation chatbots that help with qualifying leads and appointment setting. You can choose among 6 Free General LeadBots or from more than 80 industry-specific LeadBots under our LeadBot plan.

To start, click the “Add Tool” button on your Ometrics Dashboard, then select Ochatbot/LeadBot from the dropdown menu.

A popup will appear and you will need to select LeadBot.
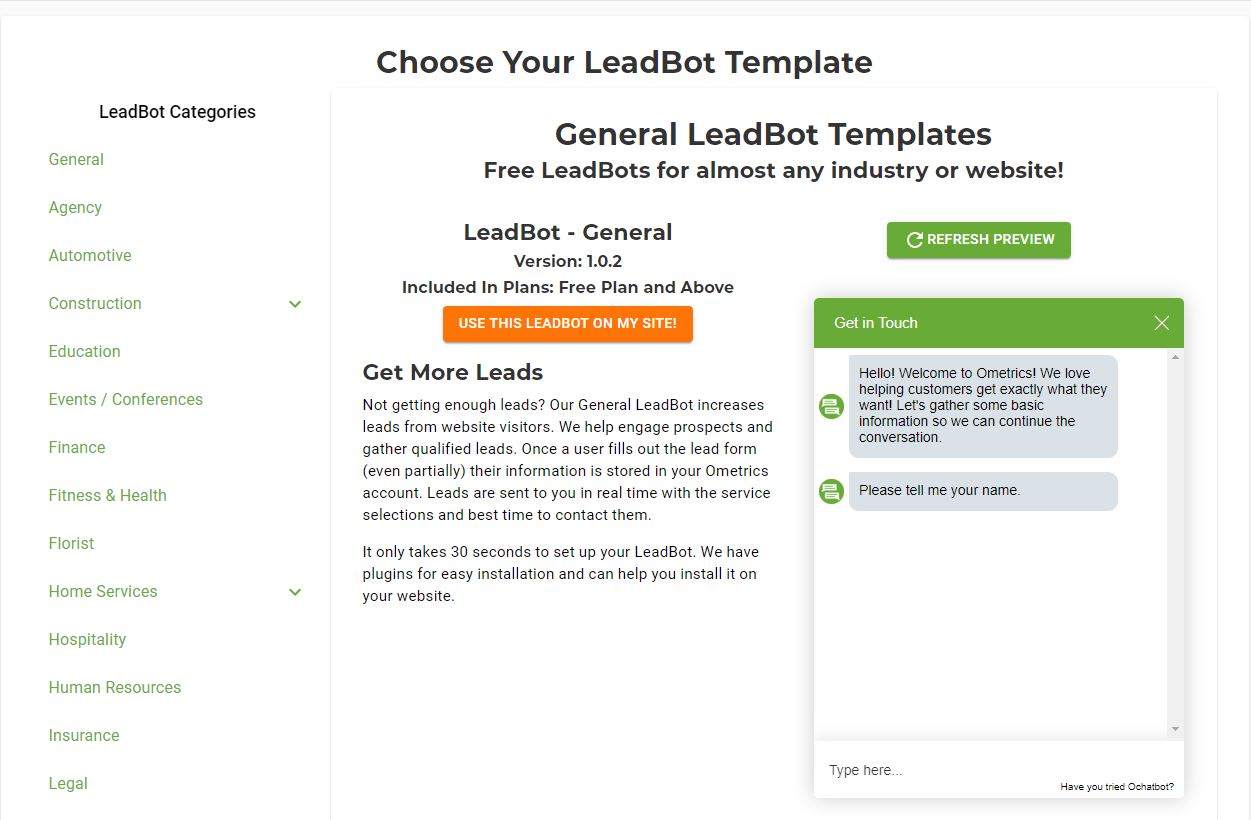
Here you can browse more than 80 LeadBot templates to choose for your business. Scroll on the left side to find your industry and click to see a preview. Click through the prompts to see which qualifying questions are asked.
Don’t see your industry? Contact us and we will build you one!
Want to ask different qualifying questions? Upgrade to a Basic or Plus plan and we will customize your LeadBot!
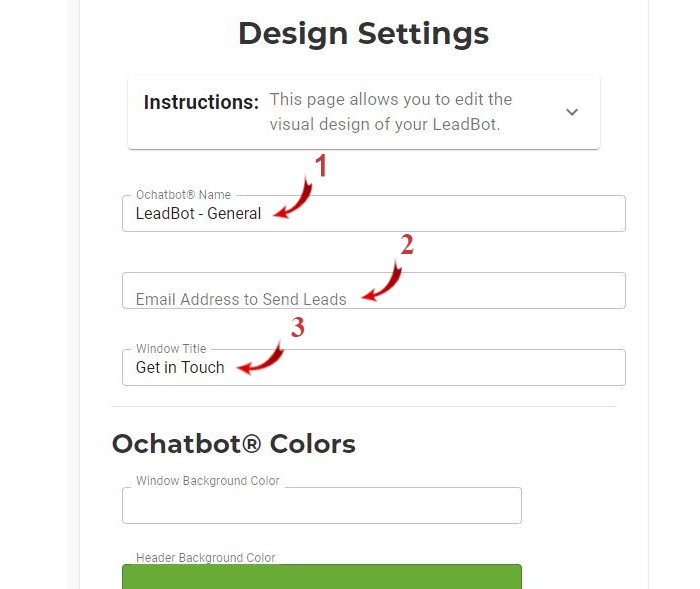
First, we edit the design of your LeadBot to match your branding
1. Ochatbot Name: Name your LeadBot to keep organized if you have multiple LeadBots
2. Email Address to Send Leads: Input the email address you would like your leads sent to. You can send leads straight into your CRM under our Plus plan.
3. Window Title: This title will appear at the top portion of the LeadBot window. It is very important to have a window title that helps increase user engagement by grabbing their attention and letting them know what will happen once they complete the lead form. For example, if you offer a free consultation or introductory call you can use “Book Your Free Consultation” or “Schedule an Intro Call”. You can also offer something more general such as “Get In Touch” or “Contact Us” or “Ask Us a Question”.
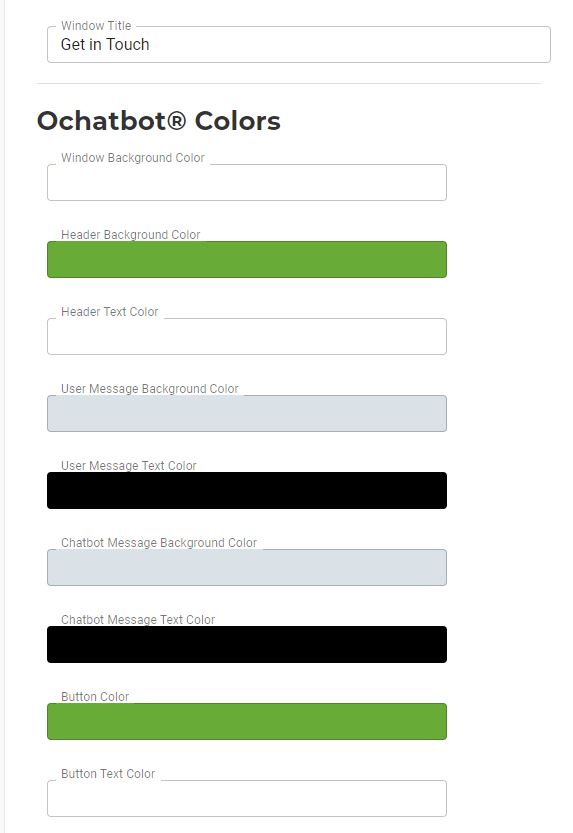
You can edit the colors of your LeadBot here. Try color combinations that not only match your website and branding but help catch the attention of your visitors.
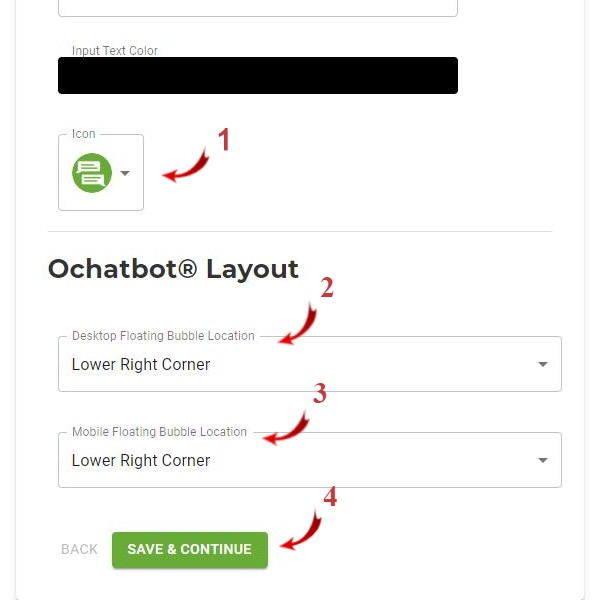
Select your icon and the location of your LeadBot
1. Icon: Select which icon you would like to use. Be sure to select an icon that grabs visitors attention and does not go unseen by blending into the background of your site.
2. Desktop Floating Bubble Location: Select your bubble location on desktop.
3. Mobile Floating Bubble Location: Select your bubble location on mobile.
4. Save & Continue: Click to save these settings and continue to the next section.

Input your customized text settings.
1. Company Name: Input your company’s name for the initial LeadBot reply. Example: “Hello! Welcome to {Company Name}! …”
2. Thank You Message: Input what you would like to say once a visitor completes the lead form. It will follow this format – “Thank you, {visitor’s name}! {Your Thank You Message}”. For example, if you input “We look forward to connecting with you soon.” in the Thank You Message field, a visitor will see this upon completing the lead form: “Thank you {visitor’s name}! We look forward to connecting with you soon.”
3. Save & Continue: Click to save these settings and continue to the next section.
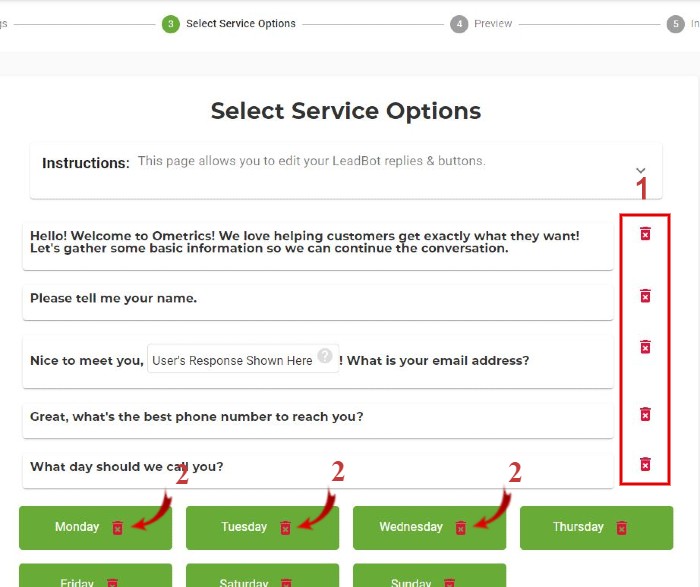
Here you review the questions your LeadBot asks visitors. You can remove whole questions or individual answers within questions.
Want to customize your questions even further? Upgrade to our Basic or Plus plans and we will customize your LeadBot!
1. Click the red trash buttons to delete whole questions.
2. Click the red trash buttons to delete individual answers within a question.

Here is a better example of when you would want to delete individual answers within a question. Let’s use our Painting LeadBot as an example: let’s say you are a painter that does only exterior painting and siding work. Click the red trash button to delete the services you do not offer such as Interior Painting, Special Finishes, and Wallpapering.
Don’t see a service you offer in your industry’s LeadBot? Contact us and we will add that service to your LeadBot!
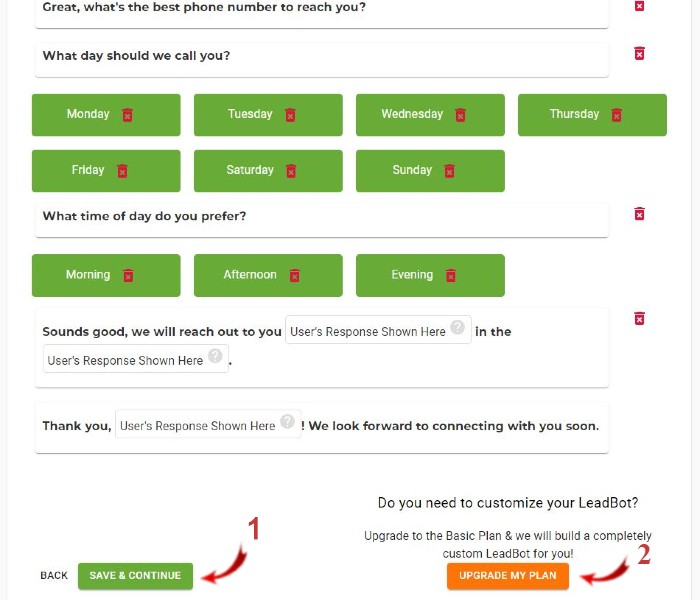
1. Click to save these settings and continue to the next section.
2. Upgrade your plan to allow even more customization.
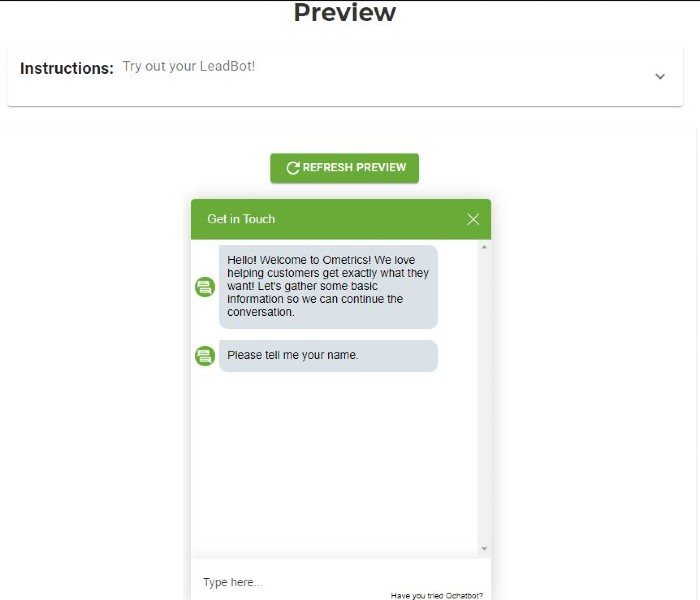
Be sure to preview! Click all the way through your LeadBot to make sure everything is exactly how you want it.
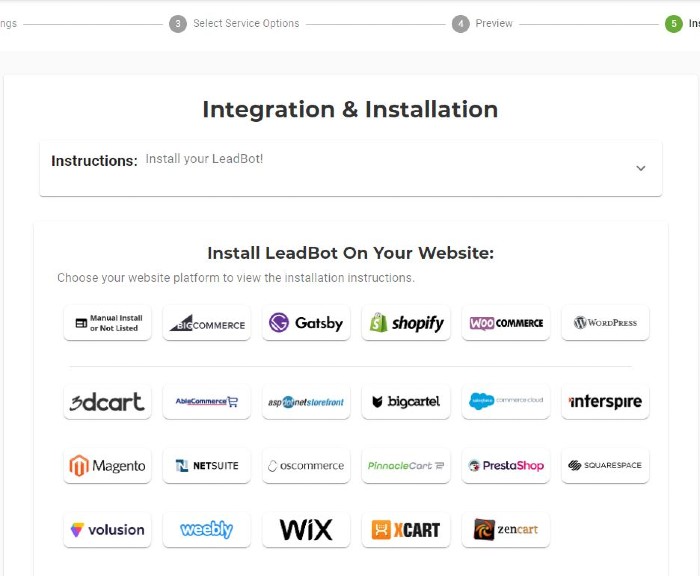
The last step is to install your Ometrics script on your website. Click on your platform to see your easy installation instructions.
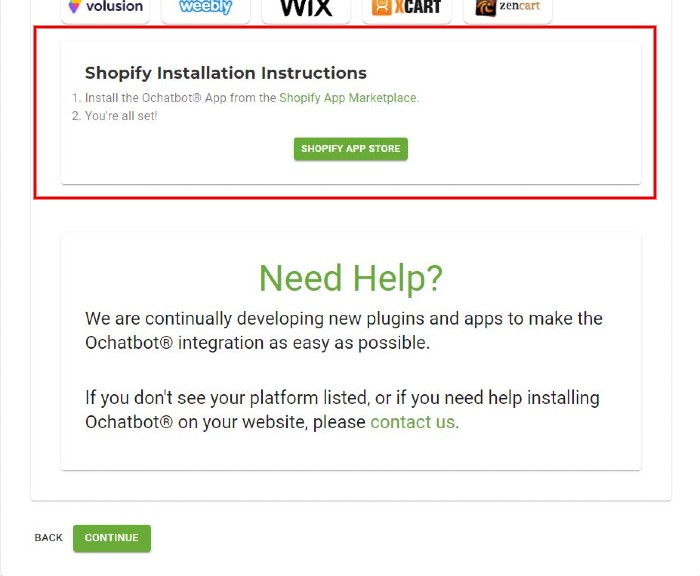
Follow the installation instructions displayed here. If you need help installing your script Contact Us and we will reach out to help guide you.
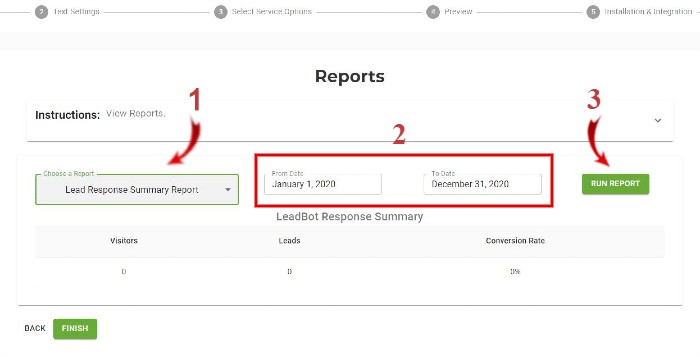
Once you complete the installation of your LeadBot be sure to check this Reporting section to review all of your leads. Leads by default will be emailed to the email address you provided or sent straight to your CRM under our Plus plan. If a visitor only partially completes a form their data will still be stored in your account which you can view using this Reporting section.
1. Choose a Report: The Lead Response Summary Report shows the number of visitors and the number of lead forms completed to easily highlight the percentage of leads vs overall visitors. The Lead Response Report will show any responses even if the visitor only answered the first question. Click the button to the right of the entry to view the entire transcript to help your site analytics and retrieve partial leads.
2. Date Range: Choose the date range for your report.
3. Run Report: Click to run the report for your selections.
Frequently Asked Questions
How do I upgrade or downgrade my account plan?
You can upgrade or downgrade any plan at any time; excluding the Pro plan due to required minimum term. Simply click the “Upgrade Now” button on the Dashboard or follow the link in the “My Account” section and select the plan you would like to switch to (upgrading or downgrading). As always, please contact support about any specific account questions.
We Are Here to Help
Here are the different ways you can contact support:
- When logged in, click the "Contact Support" button. Your information will be autopopulated so just type in your question or comment.
- To create a ticket when not logged in email: [email protected]
- Call us during business hours: 8 a.m.-5 p.m. MST 800-700-8077.
- If outside the US: send an email to [email protected] and we will set up a meeting over Zoom.